As a WordPress user, you must have come across the WordPress Admin Bar. It is the bar that runs across the top of your WordPress site when you are logged in.
The WordPress admin bar enables you to access your WordPress dashboard quickly, making it easier for you to manage your site. It contains links to pages, posts, comments, and plugins, among other things.
Note: You may also be interested in ready our guide on how to protect the WordPress admin area.
It also provides quick access to your WordPress profile, allowing you to edit it, log out, or access the WordPress dashboard.
However, did you know that you can customize the admin bar to fit your needs?
In this article, I will guide you through the process of customizing the admin toolbar step by step.
Why Customize The WordPress Admin Toolbar?
Customizing the WordPress admin bar can help you optimize your workflow and make it more efficient.
By removing unused links and adding frequently used links, you can save time and improve your productivity.
Additionally, customizing the admin bar can help you personalize your WordPress dashboard, making it easier to use and more aesthetically pleasing to your liking.
How To Customize The WordPress Admin Bar
There are several aspects of the admin bar that you can customize and I will break it down to make it more clear.
Adding custom links to the WordPress Admin Bar
To add custom links to the WordPress admin bar, you need to install an Admin Menu Editor plugin.
This enables you to add or remove links from the admin bar. Once you have installed the plugin, follow the steps below:
Go to your WordPress dashboard and click on Settings -> Menu Editor.
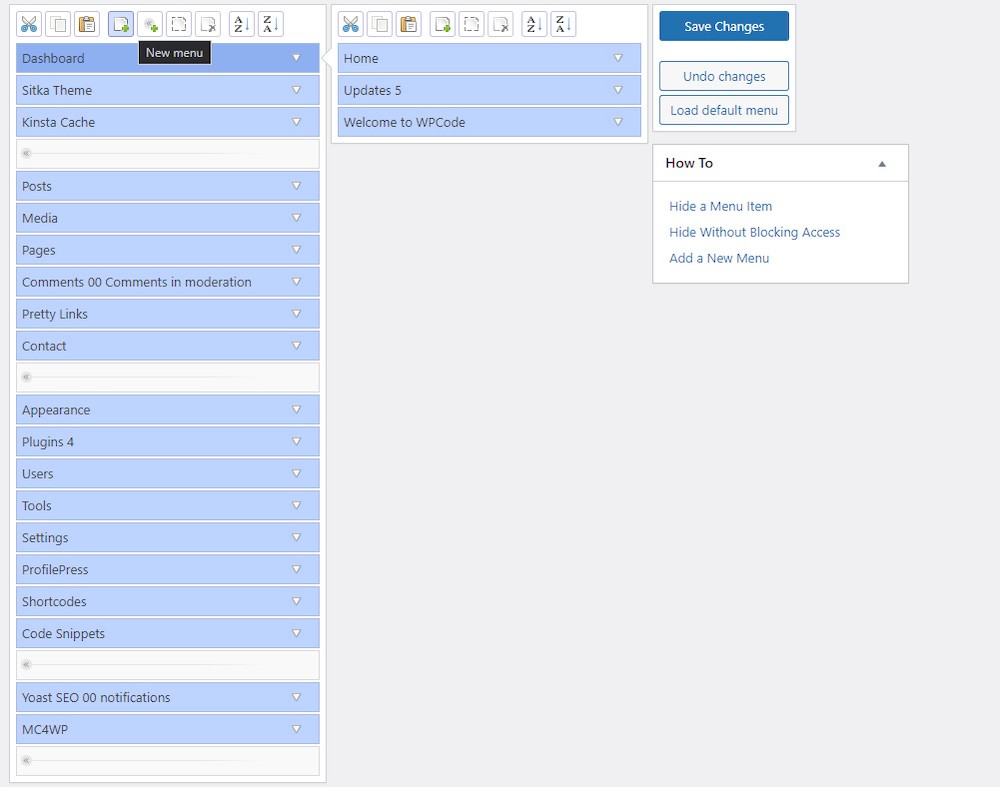
Click on Create New Menu as shown in the screenshot below.
Enter the name and URL of your custom link.
Click on the “Save Changes” button.
Your custom link should now appear on the admin bar. You can also add separators to differentiate between different groups.
Removing default links from the WordPress Admin Bar
To remove default links from the WordPress admin bar, you need to use the same plugin mentioned above. Once you have installed the plugin, follow the steps below:
Go to your WordPress dashboard and click on Settings -> Menu Editor.
Find the link that you want to remove and click on the Delete button in the upper menu.
Click on the Save Changes button.
The default link should now be removed from the WordPress admin bar.
You can also easily change the order of the menu items with a simple drag & drop.
Customizing the WordPress Admin Bar for different user roles
To customize the admin toolbar for different user roles, you need to use the same plugin mentioned above.
Once you have installed the plugin, follow the steps below:
Go to your WordPress dashboard and click on Settings -> Menu Editor.
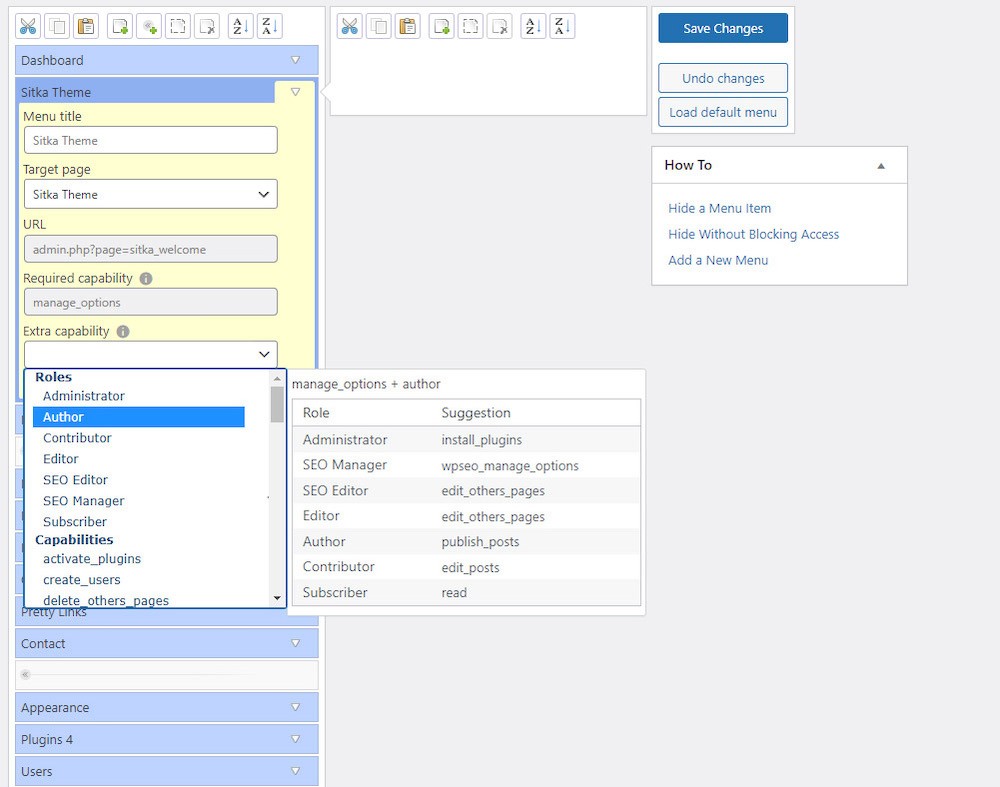
Click on the link that you want to change the roles.
After that select the Extra Capability option.
Select the user role that you want for this menu item.
Click on the Save Changes button.
The WordPress admin bar should now be customized for the selected user role.
Adding widgets to the WordPress Admin Bar
To add widgets to the admin bar, you need to install a plugin called Toolbar Extras.
This plugin enables you to add widgets to the admin toolbar. Once you have installed the plugin, follow these steps:
Go to your WordPress dashboard and click on Appearance -> Widgets.
Drag and drop the widget that you want to add to the Toolbar Extras widget area.
Click on the Save Changes button.
The widget should now appear on the WordPress admin bar.
Best practices for customizing the WordPress Admin Bar
While customizing the toolbar can be handy, following some best practices is essential to ensure that your website stays user-friendly and accessible.
Here are some best practices for customizing the WordPress admin bar:
Keep it simple and minimalistic: Avoid cluttering the admin bar with too many links or widgets. Keep it simple and only include the most essential links and widgets.
Use clear and concise labels: Ensure that the links and widgets on the toolbar have clear and easy-to-understand labels.
Test your changes: Always test your changes on different devices and browsers to ensure that they work correctly and do not affect the website’s performance.
Consider accessibility: Ensure that your customizations do not affect the website’s accessibility. For example, avoid using colors that are difficult to read for users with color blindness.
How To Move The WordPress Toolbar
To move the WordPress toolbar, you need to use a plugin that we also used before for adding widgets, Toolbar Extras.
It enables you to move the WordPress toolbar to different positions. Once you have installed the plugin, follow the steps below:
Go to your WordPress dashboard and click on Toolbar Extras -> Settings.
Click on the Toolbar Position dropdown menu.
Select the position in which you want the toolbar to appear.
Click on the Save Changes button.
The WordPress toolbar should now appear in the selected position.
How To Remove The Admin Bar
If you do not want the WordPress admin bar to appear on your site, you can remove it by adding the following code to your functions.php file:
add_filter('show_admin_bar', '__return_false');After adding the code, the WordPress admin bar will be removed from your site.
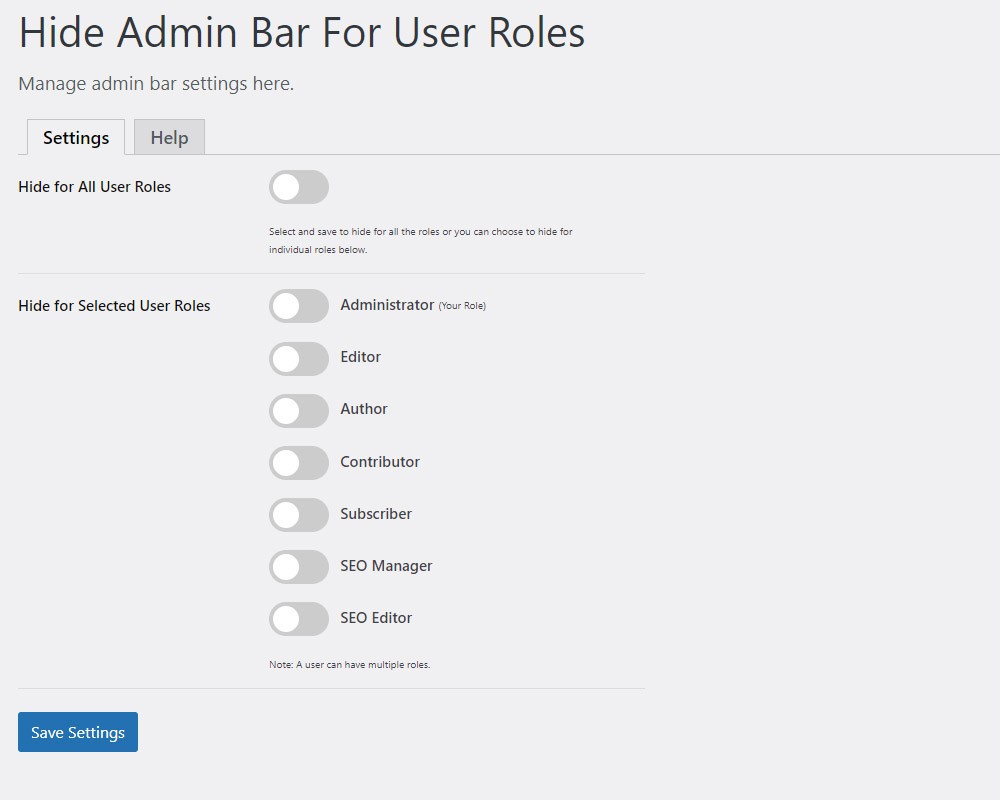
You can also use a plugin to hide the admin bar for certain user roles.
After you install and activate the plugin head to Settings -> Hide admin bar and set the roles that shouldn’t be allowed to see the admin bar.
You may also be interested in hiding other unnecessary items in the WordPress admin and tidying it up.
How To Customize The Style/Branding Of The WordPress Admin Toolbar
To customize the style/branding of the WordPress Admin Toolbar, you need to install a plugin called Better Admin Bar.
Use it to change the color, font, and background of the WordPress Admin Toolbar. Once you have installed the plugin, follow the steps below:
Go to your WordPress dashboard and click on Settings -> Better Admin Bar.
Click on Admin Bar on the left-hand side of the screen.
Customize the style/branding of the WordPress Admin Toolbar.
Click on the Save Changes button.
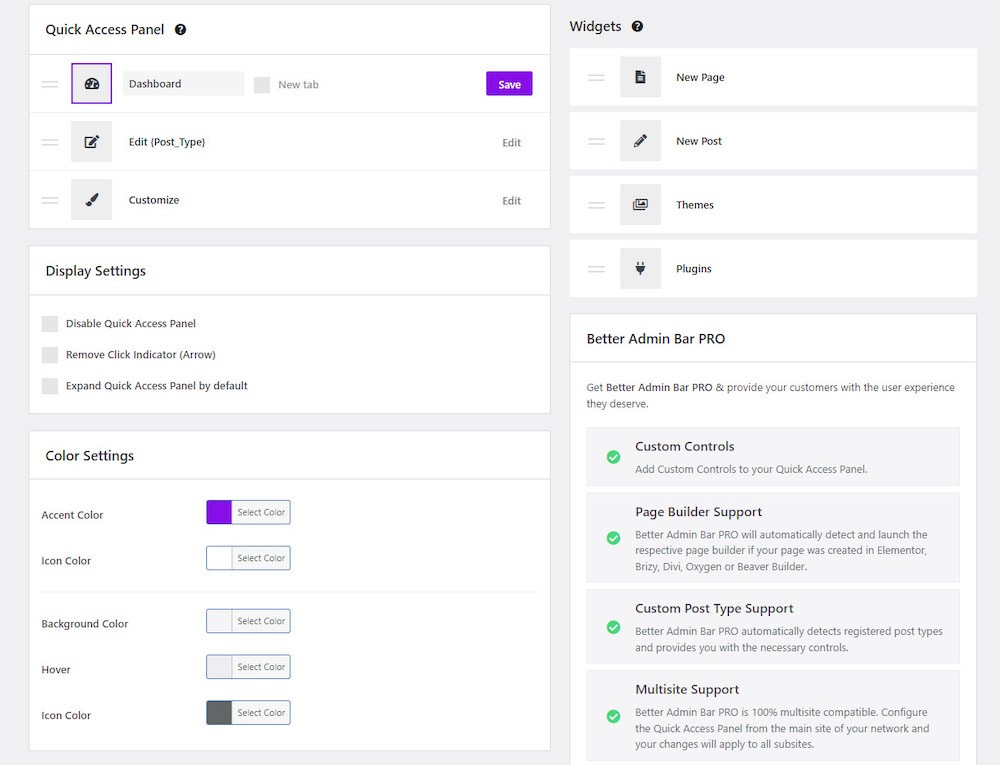
And you’re done. The WordPress Admin Toolbar is now customized to your liking.
This plugin has more customization options than the ones described above.
The PRO version of the plugin includes several more features, like customizing the WordPress admin bar for different user roles, Page Builder Support, Multisite Support, etc.
Conclusion
Customizing the WordPress admin bar can help you optimize your workflow, improve your productivity, and personalize your WordPress dashboard.
By following the step-by-step guide provided in this article, you can customize the WordPress admin bar to fit your needs.
Remember to follow best practices when making changes to ensure your site’s performance is not negatively affected.
If you have any questions about this article or other topics, please click the button below. Your questions will be answered soon.
If you want an affordable, reliable and fast WordPress server, just go ahead and click on the button and get a package as needed.
Related Posts

How to Fix Error Too Many Redirects in WordPress
Jun 23, 2023How to Fix WordPress RSS Feed Errors
Jan 16, 2023


Envato elements
Canva
InMotion Hosting
Envato Market
Envato Placeit


Blog Categories
- Agriculture 1
- Design 3
- eCommerce 13
- Energy 1
- Extras 75
- Free 4
- Grocery Store 3
- Software 1
- Technology 2
- Themes 77
- WordPress 145
- Plugins 58
- Cache 5
- Security 8
- SEO 10
- Spam 5
- User Managament 10
- WooCommerce 6
- Plugins 58
- WordPress Speed 1
- WordPress Tutorials 53